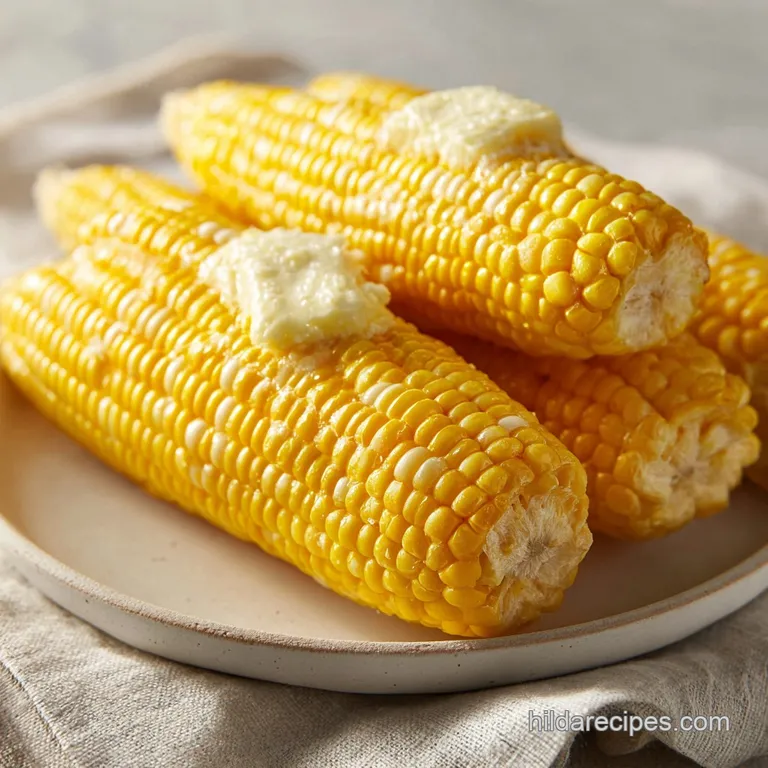
Corn on the Cob in the Microwave Without Husks with Butter
- Time: Active 2 minutes, Passive 4 minutes, Total 6 minutes
- Flavor/Texture Hook: Sweet, buttery kernels with a satisfying snap
- Perfect for: Busy weeknight sides, solo lunches, or beginner cooks
- Corn on the Cob in the Microwave without Husks with Butter
- Scientific Principles of Microwave Steaming
- Analyzing the Essential Component Roles
- Gathering the Elements for Success
- Step-by-Step Method for Microwave Corn
- Solving Common Microwave Corn Cooking Problems
- Guidelines for Scaling the Recipe
- Debunking Microwave Cooking Myths
- Storing and Repurposing Your Leftover Corn
- Favorite Ways to Plate and Enjoy Your Corn
- Recipe FAQs
- 📝 Recipe Card
Corn on the Cob in the Microwave without Husks with Butter
The sound of a fresh ear of corn snapping in half always takes me back to my grandmother's sun drenched porch in July. We would spend hours stripping away the green leaves and sticky silk, our fingers tacky with juice.
But honestly, when the Tuesday night dinner rush hits and everyone is starving, nobody has time for a giant pot of boiling water that heats up the whole house. I used to think the microwave would turn corn into rubber, but after one too many soggy stovetop disasters, I tried this method and never looked back.
Enjoy perfectly cooked Corn on the Cob in the Microwave without Husks with Butter using this simple method. The first time I pulled an ear out of the microwave using this trick, the steam smelled like pure summer candy. It was a total revelation for my weeknight routine.
No more waiting twenty minutes for water to boil or scrubbing a heavy pot afterward. You get that same tender, juicy bite every single time, and it’s actually more flavorful because the natural sugars don't leach out into a big vat of water.
This recipe is about reclaiming your time without sacrificing that classic comfort food experience. We’ve all been there, standing over a stove, watching for bubbles while the rest of the meal gets cold.
With this technique, you’re just minutes away from that golden, buttery goodness that pairs so well with a grilled steak or even just a simple salad. It’s efficient, it’s clean, and most importantly, it yields the most velvety texture you’ve ever had from a microwave.
Scientific Principles of Microwave Steaming
Vapor Pressure: By adding a small amount of filtered water to the dish, we create a miniature steam chamber that cooks the kernels from the outside in while the microwave's energy heats the moisture inside the corn.
Starch Gelatinization: The quick, intense heat causes the starch granules in the corn to swell and soften almost instantly, which prevents the kernels from becoming tough or chewy like they often do when boiled too long.
Lipid Emulsification: Adding salted butter to the hot corn immediately after cooking allows the fat to bind with the surface moisture, creating a silky glaze that sticks to the kernels rather than sliding off.
Thermal Inertia: Allowing the corn to rest for a minute after the timer pings lets the heat distribute evenly, ensuring the core of the cob is just as hot as the outer layer.
| Cooking Method | Total Time | Texture Result | Best Context |
|---|---|---|---|
| Microwave (No Husk) | 6 minutes | Tender and snappy | Quick weeknight side |
| Stovetop Boiling | 15 minutes | Soft and hydrated | Large family gatherings |
| Oven Roasting | 45 minutes | Charred and nutty | Weekend dinner parties |
This comparison shows why the microwave is such a champion for small batches. While roasting offers a deep, caramelized flavor, it takes nearly ten times as long as this microwave method. If you are preparing a larger meal, like my favorite How to Cook recipe for tri tip, having a side dish that takes less than ten minutes is a literal lifesaver.
Analyzing the Essential Component Roles
| Ingredient | Science Role | Pro Secret |
|---|---|---|
| Fresh Corn | Structure & Sugar | Choose ears with bright green husks and moist silks for the highest moisture content. |
| Salted Butter | Flavor Carrier | Use high-quality grass fed butter to get a deeper yellow hue and richer mouthfeel. |
| Filtered Water | Steam Generator | Avoid tap water with heavy chlorine scents, as the corn will absorb those subtle odors during steaming. |
Selecting the right corn is the foundation of this dish. Look for ears that feel heavy for their size, which indicates the kernels are full of juice. If you press a kernel through the husk and it squirts a milky liquid, you've found the perfect specimen for steaming.
Gathering the Elements for Success
- 2 ears Fresh Corn: Shucked and all silks removed Why this? Freshness determines the final sweetness and snap.
- 2 tbsp Filtered Water: To create the steam Why this? Prevents the kernels from drying out and wrinkling.
- 2 tbsp Salted Butter: For that classic finish Why this? Adds essential fats and salt for flavor balance.
- 1/8 tsp Smoked Paprika: A hint of woodsy heat Why this? Mimics the flavor of grilled corn without the grill.
- 1 pinch Flaky Sea Salt: For texture and pop Why this? Provides a clean salt finish that doesn't over season.
Chef's Tip: If your corn isn't at its peak sweetness (like in early spring), add a tiny pinch of granulated sugar to the water in the dish. It helps mimic the flavor of mid summer harvests.
For a substitution, you can use unsalted butter and just double the flaky salt at the end. If you want a dairy-free version, a high-quality extra virgin olive oil works surprisingly well, though you lose that creamy "corn on-the cob" nostalgia.
Some folks also swap the smoked paprika for a bit of chili powder or even nutritional yeast for a cheesy, savory kick.
step-by-step Method for Microwave Corn
- Prepare the corn. Remove all husks and every strand of silk from the 2 ears of corn. Note: Silk can burn in the microwave, so be thorough.
- Arrange in dish. Place the ears in a microwave safe glass baking dish. They should fit snugly but not be piled on top of each other.
- Add moisture. Pour the 2 tbsp of filtered water into the bottom of the dish. Until the bottom is just coated.
- Cover securely. Place a microwave safe lid or a damp paper towel over the dish. Note: This traps the steam, which is what actually cooks the corn.
- Initial cook. Microwave on high for 4 minutes. Until you hear a light popping sound.
- Check doneness. Carefully lift a corner of the cover. The kernels should look plump and bright yellow.
- Rest the ears. Leave the cover on and let the corn sit for 1 minute. Until the steam settles and heat equalizes.
- Apply butter. Use a brush or knife to coat each ear with the 2 tbsp of salted butter. Until the butter is completely melted and glistening.
- Season well. Sprinkle the 1/8 tsp of smoked paprika and a pinch of flaky sea salt evenly over the buttered kernels.
- Serve immediately. Enjoy the corn while it is piping hot and the butter is still liquid.
Chef's Tip: For the best butter adhesion, grate frozen butter over the hot corn instead of using room temperature pats. The fine shreds melt instantly into every nook and cranny.
Solving Common Microwave Corn Cooking Problems
Why Your Corn is Tough
If the kernels feel leathery or hard to chew, it is usually because the moisture escaped during the cooking process. Microwaves work by vibrating water molecules, and if that water evaporates away from the corn without being replaced by steam, the sugars will crystallize and the skin will toughen.
Always ensure your cover is tight or your paper towel is thoroughly damp to maintain that humid environment.
Dealing with Uneven Heating
Sometimes one end of the cob is scorching hot while the other is still lukewarm. This happens because microwave energy isn't always distributed perfectly. To fix this, you can pause the cooking halfway through at the 2 minute mark and rotate the ears 180 degrees.
This ensures every kernel gets equal exposure to the heat waves.
| Problem | Root Cause | Solution |
|---|---|---|
| Wrinkled Kernels | Overcooking or lack of water | Reduce time by 30 seconds and ensure water is present. |
| Rubbery Texture | Too much "dry" heat | Ensure the dish is tightly covered to trap steam. |
| Cold Spots | Poor wave distribution | Rotate the ears halfway through the 4 minute cycle. |
Common Mistakes Checklist
- ✓ Forgetting to remove every bit of silk (it can scorch and smell like burnt hair).
- ✓ Using a dish that is too large, which allows the steam to dissipate too quickly.
- ✓ Skipping the resting period, which is vital for carryover cooking.
- ✓ Using "old" corn that has already converted its sugars to starch.
- ✓ Adding salt to the water (this can actually toughen the outer skins of the kernels).
Guidelines for Scaling the Recipe
Reducing the Batch
If you are only cooking one ear of corn, reduce the cooking time to 2 minutes 30 seconds. You still need the full 2 tbsp of water to create enough steam for the dish. Use a smaller dish so the steam stays concentrated around the single ear.
Increasing the Batch
When cooking 4 ears, you'll need a larger 9x13 inch glass dish. Do not double the water; 3 tbsp is usually enough for a larger dish. Increase the cook time to 7 minutes and definitely rotate the ears halfway through.
It is often better to work in batches of two if your microwave is on the smaller side to ensure even cooking.
If you are planning a bigger meal and want something sweet for dessert, these corn ears are light enough that you'll have room for my Classic Buttery Shortbread recipe afterward.
Debunking Microwave Cooking Myths
"Microwaves kill the nutrients in vegetables." In reality, because this method uses very little water and a short cooking time, it actually preserves more vitamin C and antioxidants than boiling, where the nutrients leach out into the discarded water.
The quick heat is much gentler on the delicate compounds in fresh produce.
"You must leave the husk on to get good microwave corn." While the husk is a natural steamer, it’s messy and makes the silk almost impossible to remove after cooking. By shucking first and adding water to the dish, we recreate the same steam effect without the burnt leaves or the struggle of de silking a scalding hot ear of corn.
Storing and Repurposing Your Leftover Corn
Storage: Store any leftover buttered corn in an airtight container in the fridge for up to 3 days. To reheat, wrap the ear in a damp paper towel and microwave for 45 seconds. It won't be quite as snappy as day one, but it still tastes wonderful.
Freezing: You can cut the kernels off the cob and freeze them in a freezer bag for up to 3 months. I don't recommend freezing the whole cob as the texture can become quite mushy upon thawing.
Zero Waste: Never throw away the cobs! Even after you've eaten the kernels, the cobs hold immense flavor. Toss them into a pot with some onion scraps and water to make a "corn stock." It's a fantastic base for summer chowders or risotto.
If you have extra butter and paprika, you can also mix them into a compound butter for later use on toast or grilled fish.
Favorite Ways to Plate and Enjoy Your Corn
Presentation matters, even for a quick side dish. I love serving these on a long wooden board with extra wedges of lime and a dusting of cotija cheese if I'm feeling fancy. The contrast between the bright yellow corn and the red paprika is stunning.
If you're looking for a more "main event" vibe, serve the corn alongside some grilled protein.
For a fun twist, try cutting the corn into smaller "ribs" or rounds before serving. This makes them easier to eat at a party and allows the butter and seasonings to coat more surface area.
I also like to keep a small jar of the smoked paprika salt mix on the table so people can add an extra punch of flavor if they like. It’s all about making that simple ear of corn feel like a special treat rather than just a quick afterthought.

Recipe FAQs
Can you microwave an ear of corn without the husk?
Yes, absolutely. Cooking shucked corn in the microwave requires adding a small amount of water to the dish and covering it tightly to create steam.
How to cook corn cobs in the microwave?
Place shucked corn in a microwave safe dish with 2 tablespoons of water and cover tightly. Microwave on high for 4 minutes, then let it rest for 1 minute before buttering and serving.
Should I add water when microwaving corn?
Yes, you must add a small amount of water. This water turns into steam under the cover, which cooks the corn evenly and prevents the kernels from drying out and becoming tough.
How do you microwave corn that has been shucked?
Arrange the shucked ears in a dish with water and secure a lid or damp paper towel on top. The cover traps the steam, mimicking a pressure cooker environment for tender results. If you enjoyed mastering this quick steaming technique, see how the same principle of rapid moisture conversion works when making our Johnny Marzetti Recipe.
Is it true that microwaving corn without the husk makes it taste boiled?
No, this is often due to insufficient seasoning or moisture loss. Boiling leaches flavor into the water, but microwaving traps all the natural sugars inside the kernel, provided you use the steaming method correctly.
What is the ideal microwave power setting for buttery corn?
Always use high (100%) power for the initial 4-minute cook. The goal is rapid steam generation; using a lower setting might dry the corn out before the internal temperature is sufficient, similar to how you need full power for making Crispy Hash Browns recipe quickly.
Can I substitute the water with milk for added richness?
No, avoid substituting water with milk directly in the dish. Milk solids can scorch quickly in the microwave, creating an unpleasant burned flavor that will stick to the corn.
Microwave Corn Without Husks
Ingredients:
Instructions:
Nutrition Facts:
| Calories | 188 kcal |
|---|---|
| Protein | 3.3 g |
| Fat | 12.7 g |
| Carbs | 19 g |
| Fiber | 2 g |
| Sugar | 6.3 g |
| Sodium | 305 mg |
