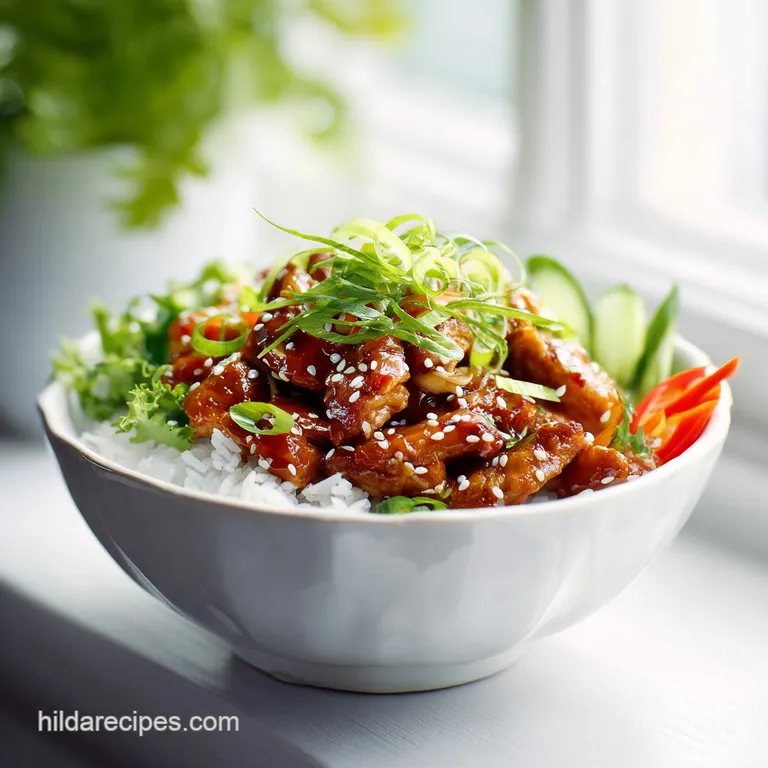
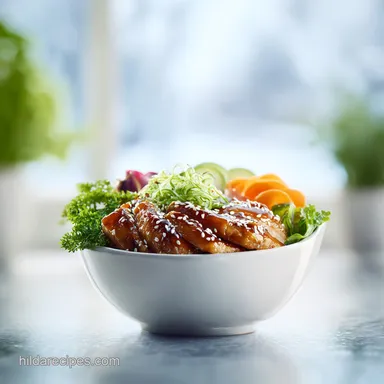
Teriyaki Chicken Bowl with Ginger Glaze
- Time: Active 15 minutes, Passive 15 minutes, Total 30 minutes
- Flavor/Texture Hook: Sticky sweet glaze with a gingery snap and velvety chicken
- Perfect for: Stress free weeknight dinners and high protein meal prep
- Bringing a Homemade Teriyaki Chicken Bowl Home
- Building Deep Layers of Umami Flavor
- Essential Timings and Precise Recipe Specs
- Sourcing Fresh Ingredients for Better Bowls
- Essential Tools for Professional Results
- Detailed Step by Step Cooking Guide
- Solving Common Sauce and Chicken Problems
- Fresh Variations and Ingredient Substitutions
- Storage and Zero Waste Kitchen Tips
- Creative Serving and Garnish Ideas
- Recipe FAQs
- 📝 Recipe Card
Bringing a Homemade Teriyaki Chicken Bowl Home
The kitchen fills with a sharp, spicy aroma the moment that fresh ginger hits the shimmering avocado oil. It is a scent that immediately pulls me back to my mother’s kitchen, where she taught me that the best meals do not come from a plastic container but from a heavy bottomed pan and a bit of patience.
I remember the first time I tried to make a Teriyaki Chicken Bowl; I rushed the heat and ended up with a burnt, bitter sauce that stuck to the pan like glue. It was a mess, but it taught me the most important lesson in Japanese inspired cooking: heat management is everything.
Today, we are skipping the takeout menu and building something far superior. We're talking about chicken that has been seared until the edges are slightly crisp, then tossed in a sauce so glossy you can almost see your reflection in it.
There is no cornstarch slurry here just the natural reduction of honey, soy, and mirin creating a thick, luxurious coating. It is the kind of comfort food that feels like a warm hug after a long day, and honestly, once you see how easy it is to achieve that signature shine, you will never look back at a bottled sauce again.
We are going to focus on layering the flavors properly. We start with the base of aromatics, move to the over high heat sear of the protein, and finish with a gentle simmer that lets the sauce cling to every crevice of the chicken. It is a simple process, but the results are nothing short of transformative.
Grab your favorite skillet, and let's get that brown rice steaming; we have a masterpiece to build.
Building Deep Layers of Umami Flavor
The magic of this dish lies in the chemistry between the sugars and the proteins. When we cook the chicken, we are looking for the Maillard reaction that beautiful browning that creates complex, savory notes. But the real secret is how the sauce interacts with the meat during the final minutes.
Caramelization Control: The honey and mirin contain natural sugars that thicken as water evaporates, creating a protective, flavor dense coating. This "glaze" occurs when the liquid reduces enough for the sugar molecules to begin breaking down and reforming into a sticky, complex syrup.
| Method | Cook Time | Texture | Visual Cue |
|---|---|---|---|
| Stovetop | 15 minutes | Crispy edges, juicy interior | Sauce bubbles and clings immediately |
| Oven | 25 minutes | Uniformly tender, less char | Glaze is thinner and more translucent |
Choosing the right cooking method depends on your preference for texture. While the oven is great for a hands off approach, the stovetop method is what gives you those sought after caramelized bits that make a Teriyaki Chicken Bowl truly stand out.
Achieving the Perfect Maillard Glaze
To get that deep color, you must ensure your pan is hot enough to sear the meat without boiling it. If the chicken releases too much moisture at once, it will steam instead of brown. I always pat the chicken 680g of chicken thighs bone dry with a paper towel before they even touch the oil.
This small step is the difference between grey meat and golden brown perfection.
Balanced Umami Without Extra Sodium
Using low sodium soy sauce (80ml) is a strategic choice, not just a health one. It allows us to reduce the sauce significantly to intensify the flavor without the saltiness becoming overwhelming. If you use full sodium soy, the final reduction will likely be too sharp on the palate.
| Ingredient | Science Role | Pro Secret |
|---|---|---|
| Mirin | Acid & Sugar | Adds a lustrous shine that soy sauce alone cannot achieve. |
| Avocado Oil | High Smoke Point | Allows for over high heat searing without the oil breaking down or smoking. |
| Ginger | Protease Enzymes | Fresh ginger contains enzymes that help slightly tenderize the chicken fibers. |
The interaction between the acidity of the 30ml of rice vinegar and the sweetness of the 45ml of honey creates a balanced profile that cuts through the fat of the chicken thighs. This balance is what keeps you coming back for a second bowl.
Essential Timings and Precise Recipe Specs
Accuracy in the kitchen leads to consistency, especially when you are balancing sweet and salty components. We are aiming for a total cook time of exactly 15 minutes to ensure the chicken remains succulent while the sauce reaches its peak viscosity. If you've ever enjoyed a Mediterranean Chicken Bowl recipe, you know that the texture of the protein is what anchors the entire meal.
Chef Tip: Grate your 15g of ginger directly into the pan using a microplane. The fine texture allows the ginger to "melt" into the sauce, providing flavor without woody chunks.
For the chicken, 680g of boneless, skinless thighs is the sweet spot for four servings. Thighs are far more forgiving than breasts; they contain enough intramuscular fat to stay juicy even if you overcook them by a minute or two.
We want 1 inch pieces large enough to stay moist, but small enough to be eaten easily with chopsticks or a spoon.
Sourcing Fresh Ingredients for Better Bowls
Every component in this bowl serves a specific purpose. We aren't just throwing things together; we are selecting elements that provide contrast. The 400g of cooked brown rice offers a nutty, chewy base that stands up well to the heavy sauce, unlike white rice which can sometimes turn mushy if over saturated.
The Chicken and Base Components
- Chicken Thighs (680g): Boneless and skinless for quick cooking. Why this? Higher fat content ensures the meat stays velvety under high heat.
- Brown Rice (400g): Cooked according to package instructions. Why this? Provides a sturdy, fiber rich foundation for the heavy glaze.
- Avocado Oil (15ml): A neutral oil with a high smoke point. Why this? Prevents the pan from smoking during the initial sear.
The Homemade Teriyaki Sauce Blend
- Low Sodium Soy Sauce (80ml): The savory backbone of the dish. Why this? Allows for reduction without excessive saltiness.
- Honey or Maple Syrup (45ml): The primary sweetener. Why this? Creates the "sticky" factor and balances the soy.
- Rice Vinegar (30ml): Provides necessary acidity. Why this? Brightens the sauce and cuts through the sweetness.
- Mirin (15ml): Japanese sweet rice wine. Why this? Essential for that professional, glossy finish.
- Toasted Sesame Oil (5ml): Use only at the end. Why this? Adds a deep, nutty aroma that heat can easily destroy.
Final Bowl Assembly Steps
- Broccoli Florets (300g): Steamed until tender crisp.
- Shredded Carrots (100g): For color and a fresh crunch.
- Aromatics: 15g fresh ginger and 3 cloves of minced garlic.
- Garnishes: 1 tbsp sliced green onions and 1 tsp toasted sesame seeds.
| Original Ingredient | Substitute | Why It Works |
|---|---|---|
| Honey | Brown Sugar | Adds a deep molasses note but less shine. |
| Rice Vinegar | Apple Cider Vinegar | Similar acidity. Note: Adds a slight fruity undertone. |
| Mirin | Dry Sherry + Sugar | Mimics the sweetness and alcohol content of mirin. |
Using high-quality ingredients like real toasted sesame oil can make a massive difference. If you're looking for another quick dinner idea, our Chicken Rice Bowl recipe uses a similar base logic but with a completely different flavor profile.
Essential Tools for Professional Results

You do not need a kitchen full of gadgets, but a few specific items will make your life much easier. A large, heavy bottomed skillet ideally stainless steel or cast iron is non negotiable.
These materials hold heat much better than thin aluminum pans, which is vital for getting a good sear on 680g of chicken.
You will also want a sturdy whisk for combining the sauce ingredients and a microplane for that 15g of fresh ginger. If you're using a Korean Chicken Breast recipe technique in the future, these same tools will serve you well. A meat thermometer is also a great "safety net" to ensure your chicken hits exactly 74°C (165°F).
Detailed step-by-step Cooking Guide
Let’s get into the flow of the kitchen. Cooking is a dance of timing, and with a 30 minute total window, we need to be efficient. Ensure your 400g of brown rice is already cooked and warm before you start the chicken.
- Prep the chicken. Cut 680g of chicken thighs into 1 inch pieces and pat them completely dry. Note: Moisture is the enemy of a good sear.
- Whisk the sauce. In a small bowl, combine 80ml soy sauce, 45ml honey, 30ml rice vinegar, and 15ml mirin. until fully incorporated and smooth.
- Heat the oil. Add 15ml avocado oil to a large skillet over medium high heat. until the oil shimmers and swirls easily.
- Sear the meat. Add the chicken pieces in a single layer. until golden brown and slightly crisp on one side (about 5 minutes).
- Add aromatics. Stir in 15g grated ginger and 3 cloves minced garlic. until the fragrance fills the room (about 1 minute).
- Deglaze the pan. Pour in the sauce mixture, scraping the bottom of the pan with a wooden spoon. until the browned bits are incorporated.
- Simmer and thicken. Reduce heat to medium and cook. until the sauce reduces by half and coats the chicken like velvet (about 4-5 minutes).
- Finish the sauce. Remove from heat and stir in 5ml toasted sesame oil. Note: This preserves the delicate aroma.
- Steam the vegetables. Ensure your 300g of broccoli is tender crisp. until it turns a vibrant, bright green.
- Assemble the bowls. Divide 400g rice into four bowls, top with chicken, broccoli, and 100g carrots. until the bowl looks balanced and colorful.
Chef Tip: If your sauce is taking too long to thicken, turn the heat up slightly, but don't walk away. The transition from "perfectly thick" to "burnt sugar" happens in seconds.
Solving Common Sauce and Chicken Problems
Even the most seasoned cooks hit a snag now and then. The most common issue with a Teriyaki Chicken Bowl is a sauce that refuses to thicken or chicken that turns out tough. Usually, these problems are a result of temperature fluctuations.
Fixing Thin or Watery Sauce
If your sauce is still runny after 5 minutes of simmering, it usually means there was too much moisture released from the chicken. You can continue to simmer it, but be careful not to overcook the meat.
A quick fix is to remove the chicken and reduce the sauce on its own for another 2 minutes before tossing the meat back in.
Preventing Dry Chicken
Tough chicken is almost always a result of using breasts instead of thighs or overcooking the meat during the initial sear. If you find your chicken is consistently dry, try cutting the pieces slightly larger (1.5 inches) or shortening the initial sear time.
| Problem | Root Cause | Solution |
|---|---|---|
| Sauce is too salty | Soy sauce reduced too far | Add a splash of water or a teaspoon of honey to balance. |
| Chicken is grey/boiled | Pan was overcrowded | Cook chicken in two batches to allow steam to escape. |
| Ginger tastes bitter | Garlic or ginger burnt | Add aromatics only after the chicken has browned significantly. |
Common Mistakes Checklist
- ✓ Never add the sesame oil at the beginning; it has a low smoke point and will taste acrid.
- ✓ Ensure the 300g of broccoli is drained well after steaming so it doesn't water down the sauce.
- ✓ Don't skip the mirin; it's the key to the professional shine.
- ✓ Wait for the "shimmer" in the oil before adding chicken to prevent sticking.
- ✓ Use a large enough pan (30cm+) to prevent the chicken from steaming in its own juices.
Fresh Variations and Ingredient Substitutions
The beauty of a Teriyaki Chicken Bowl is its flexibility. While the traditional version is a classic for a reason, you can easily adapt this to suit different dietary needs or just to use up what is in your fridge.
Tips for Meal Prep Success
If you are making this for the week, keep the sauce and chicken together, but store the 300g of broccoli in a separate corner of your container. This prevents the vegetables from becoming overly soggy when you reheat. The flavors actually deepen overnight, making the second day lunch even better than the first dinner.
Low Carb Swap Ideas
For a lighter version, swap the 400g of brown rice for cauliflower rice or even a bed of sautéed zoodles. If you do this, you might want to double the 100g of carrots to add more bulk to the bowl. The sauce is flavorful enough to carry the neutral taste of cauliflower beautifully.
Adding a Spicy Kick
If you like heat, whisk in 1 tablespoon of sriracha or half a teaspoon of red chili flakes into the sauce mixture. The heat pairs exceptionally well with the honey and ginger, creating a "spicy teriyaki" vibe that is very popular in West Coast style grill shops.
Storage and Zero Waste Kitchen Tips
Leftover Teriyaki Chicken Bowl will stay fresh in the fridge for up to 4 days when kept in an airtight container. When reheating, I recommend adding a tiny splash of water (about 15ml) to the chicken before microwaving; this helps loosen the glaze and prevents the honey from turning into a hard candy texture.
For zero waste, do not toss those broccoli stems! Peel the tough outer skin with a vegetable peeler, slice the tender core into matchsticks, and toss them into the pan along with the 100g of carrots. They have a wonderful crunch and a sweet, mild flavor.
Also, if you have leftover sauce in the pan, toss in some leftover greens like spinach or kale they will wilt in seconds and soak up all that umami goodness.
Creative Serving and Garnish Ideas
Presentation is the final layer of flavor. A sprinkle of 1 tsp toasted sesame seeds and a handful of sliced green onions adds texture and a fresh bite that cuts through the richness of the glaze.
If you want to go the extra mile, a few thin slices of fresh radish or a squeeze of lime can add a surprising and welcome pop of brightness.
Serve this in deep bowls to keep the heat in, and don't be afraid to drizzle any extra sauce from the pan directly over the 400g of brown rice. This is a meal meant to be enjoyed thoroughly, with every grain of rice coated in that ginger garlic magic.
It’s traditional, it’s comforting, and it’s a recipe you’ll likely find yourself making week after week.

Recipe FAQs
What goes into a chicken teriyaki bowl?
Chicken, rice, vegetables, and a homemade glaze. The core components include seared chicken thighs, a base of brown rice, crisp vegetables like steamed broccoli, and a rich sauce made from soy sauce, honey, mirin, and fresh ginger.
Are chicken teriyaki bowls healthy?
Yes, they can be very healthy, especially when made at home. Using lean chicken thighs over brown rice provides excellent protein and fiber, but watch the sugar content in the glaze, which is easily controlled compared to store-bought sauces.
What vegetables go well in a teriyaki bowl?
Steamed broccoli and shredded carrots are excellent starting points. They provide color, nutrients, and a needed textural crunch against the sticky chicken. You can also add snap peas or sliced mushrooms for variety.
Do you put teriyaki sauce on chicken before or after cooking?
Apply the sauce near the very end, during the reduction phase. Searing the chicken first develops flavor through the Maillard reaction; adding the sugar heavy sauce too early causes burning before the chicken is cooked through.
How to ensure the homemade teriyaki sauce is shiny and thick?
Simmer the sauce uncovered until it reduces by half. The combination of honey and mirin must gently reduce to achieve that signature gloss; rushing this step results in a thin, watery coating. Mastering this reduction technique is similar to controlling the consistency needed for our Healthy Chicken Parmesan recipe.
Can I use chicken breast instead of thighs in this recipe?
Yes, but use caution regarding cooking time and heat. Chicken breasts are leaner and dry out much faster than thighs, so ensure you cut them into uniform pieces and cook them quickly to maintain juiciness.
What is the best rice to use for a sturdy teriyaki bowl base?
Brown rice is recommended for its nutty flavor and hearty texture. It stands up best to the heavy glaze without becoming overly mushy upon standing. For another grain alternative, you could try quinoa, similar to how we use it in the Grilled Salmon Asparagus recipe.
Teriyaki Chicken Bowl Recipe
Ingredients:
Instructions:
Nutrition Facts:
| Calories | 448 kcal |
|---|---|
| Protein | 38.2 g |
| Fat | 11.6 g |
| Carbs | 47.8 g |
| Fiber | 4.5 g |
| Sugar | 14.2 g |
| Sodium | 685 mg |
