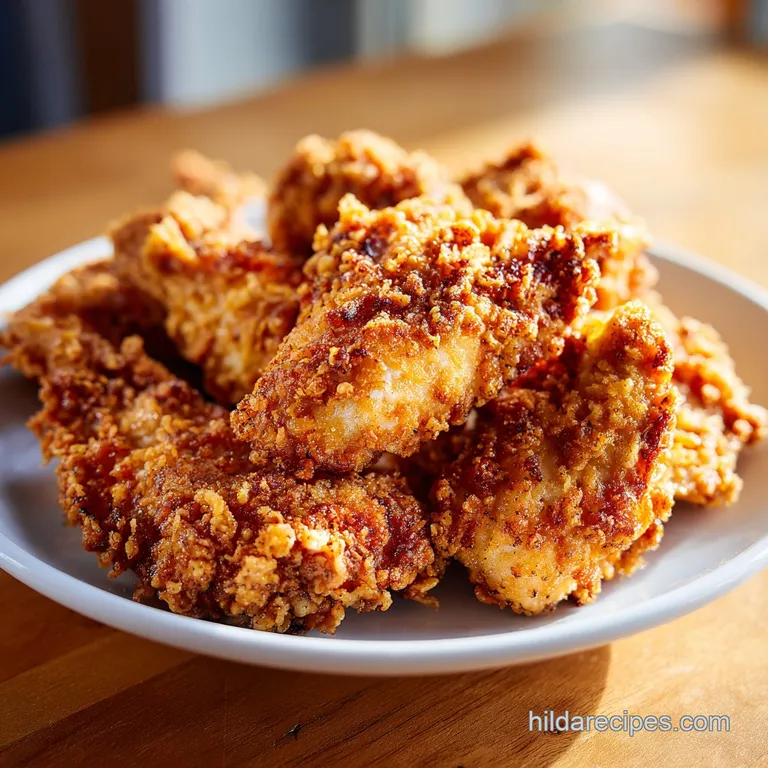
Shatter-Crisp Oven Fried Chicken
- Time: Active 15 minutes, Passive 40 minutes, Total 55 minutes
- Flavor/Texture Hook: Shatter crisp panko crust with a smoky, herbaceous finish.
- Perfect for: Family Sunday dinners or a healthier weeknight comfort food fix.
- Making The Best Oven Fried Chicken
- Why This Crispy Coating Works
- Simple Specs For Chicken Success
- Pantry Staples You Will Need
- Essential Tools For Easy Cooking
- From Raw Prep To Plate
- Fixing Common Chicken Cooking Issues
- Fun Flavor Variations To Try
- Storing And Reheating Your Chicken
- Side Dishes To Serve Tonight
- Very High in Sodium
- Recipe FAQs
- 📝 Recipe Card
Making The Best Oven Fried Chicken
If you grew up in a house where the sound of popping grease in a cast iron skillet was the official soundtrack of Sunday afternoon, you know exactly what I’m talking about. My grandmother used to stand over that stove for an hour, turning pieces of flour dusted chicken until her kitchen smelled like a dream and her apron was speckled with oil.
That flavor is part of my DNA, but let's be honest nobody has time for the cleanup or the heavy feeling that follows a deep fried feast every single week.
I remember the first time I tried to bake "fried" chicken. It was a soggy, pale mess that tasted more like wet bread than a crispy treat. I almost gave up on the idea entirely until I realized that recreating that soul warming crunch is actually about managing moisture and air, not just dumping it in a vat of oil.
This version honors those Southern roots but makes it possible to have that incredible, savory aroma filling your house on a random Tuesday without the grease splattered stovetop.
We’re going for that deep, golden brown hue and a crust that literally shatters when you bite into it. The secret lies in the contrast between the velvety buttermilk marinade and the jagged edges of the panko crumbs.
When that chicken hits the hot oven, the aroma of smoked paprika and dried thyme starts to swirl through the kitchen, signaling to everyone in the house that something truly special is happening. It’s comfort food that feels lighter but tastes just as indulgent as the original.
Why This Crispy Coating Works
Getting a crunch in the oven requires a bit of clever kitchen physics that most people skip. Here is why this method actually delivers on the promise of crispiness without the fry.
- Convection Airflow: Placing the chicken on a wire rack allows hot air to circulate under the meat, preventing the bottom from sitting in juices and turning into a soggy sponge.
- Starch Gelatinization: The combination of flour and panko creates different layers of texture; the flour bonds to the skin while the panko provides the structural "shatter."
- Fat Distribution: Drizzling melted butter over the coating mimics the frying process by hydrating the starches, which allows them to brown and crisp up rather than staying dry and chalky.
- Lactic Acid Tenderizing: The buttermilk doesn't just act as a glue; the natural acidity breaks down lean muscle fibers, ensuring the meat stays juicy even at high oven temperatures.
| Method | Finish Time | Texture Result | Best Use Case |
|---|---|---|---|
| Baking on Pan | 40 minutes | Soft bottom, crispy top | Quick cleanup only |
| Wire Rack | 40 minutes | Consistent 360 degree crunch | Perfect results every time |
| Cold Oven Start | 55 minutes | Greasy, heavy coating | Avoid this method |
The temperature of your oven is a non negotiable factor here. We are cooking at 425°F because that high heat is necessary to "set" the crust before the chicken can release too much steam.
If the oven is too cool, the steam from the meat will soften the breading from the inside out before it has a chance to turn golden.
Simple Specs For Chicken Success
When you are planning your meal, knowing exactly how much you need to buy and how long it will take is the difference between a relaxed evening and a kitchen crisis.
| Servings | Chicken Amount | Flour/Panko Mix | Cook Time |
|---|---|---|---|
| 2 People | 1 lb thighs | 0.25 cup flour / 0.75 cup panko | 40 minutes |
| 4 People | 2 lbs thighs | 0.5 cup flour / 1.5 cups panko | 40 minutes |
| 8 People | 4 lbs thighs | 1 cup flour / 3 cups panko | 45 minutes |
Keep in mind that if you are doubling the recipe for a crowd, you may need two separate baking sheets. Overcrowding the wire rack will trap steam between the pieces of chicken, which is the ultimate enemy of a crispy finish.
Give each piece at least an inch of "breathing room" to ensure the air can flow freely around the entire surface.
Pantry Staples You Will Need
The beauty of this dish is that most of what makes it "wow" is already sitting in your spice cabinet. We aren't using anything fancy, just the right ingredients used the right way.
- Bone in, Skin on Chicken Thighs: These are essential because the skin provides the fat needed for the crust, and the bone keeps the meat from drying out.
- Full fat Buttermilk: I never bother with the low-fat stuff; you need that thickness to hold the breading in place.
- Panko Breadcrumbs: These Japanese style crumbs are larger and airier than standard breadcrumbs, which is what gives you that "fried" texture.
- Smoked Paprika: This adds a deep, woody color and a hint of char that makes the chicken look like it came out of a professional kitchen.
- Unsalted Butter: We melt this to drizzle over the top, which creates the browning reaction we all crave.
| Component | Role in Dish | Pro Secret |
|---|---|---|
| Buttermilk | Binder and Tenderizer | Add a splash of pickle juice for extra tang |
| Panko | The "Crunch" Factor | Press firmly into the meat to ensure it sticks |
| Smoked Paprika | Color and Depth | Toast it in a dry pan for 30 seconds first |
If you find yourself out of buttermilk, don't panic. You can make a quick substitute by adding a tablespoon of lemon juice or white vinegar to a cup of whole milk and letting it sit for five minutes. It won't be quite as thick, but it will do the job in a pinch. If you're looking for a different vibe entirely, you might enjoy my Mediterranean chicken which uses a totally different spice profile but keeps that juicy interior.
Essential Tools For Easy Cooking
You don't need a deep fryer, but a few specific tools will make your life much easier and your chicken much crispier.
- Rimmed Baking Sheet: This catches any drips of butter or juice so your oven stays clean.
- Wire Cooling Rack: This is the most important tool. It raises the chicken up so air can hit the bottom.
- Instant read Thermometer: Don't guess. 165°F is the magic number for safety and juiciness.
- Shallow Dredging Bowls: Use wide, flat bottomed bowls so you can easily coat the entire thigh without making a mess.
Chef's Note: If your wire rack isn't non stick, be sure to give it a very generous coating of cooking spray. Nothing is more heartbreaking than a perfectly crispy crust sticking to the metal and tearing off when you try to serve it.
From Raw Prep To Plate

Let’s walk through the process. The smell of the hot butter hitting the smoked paprika in a 425°F oven is something you will never forget it’s the scent of pure home cooked comfort.
- Preheat and Prep: Set your oven to 425°F (220°C). Grab a large rimmed baking sheet, fit it with a wire cooling rack, and spray that rack well with non stick spray.
- Dry the Chicken: Use paper towels to pat the 2 lbs of chicken thighs bone dry. Note: Any surface moisture will steam the breading rather than letting it crisp. Season them all over with 1 tsp Kosher salt and 0.5 tsp black pepper.
- Mix the Binder: In a shallow bowl, whisk together 1 cup buttermilk, 1 large beaten egg, and 1 tbsp hot sauce until smooth and pale orange.
- Prep the Coating: In another shallow bowl, stir 0.5 cup all purpose flour, 1.5 cups panko, 1 tbsp smoked paprika, 1 tsp garlic powder, 1 tsp onion powder, and 0.5 tsp dried thyme.
- Dredge the Meat: Dip a thigh into the buttermilk, let the excess drip off, then press it hard into the panko mix until no pink shows through.
- Arrange for Airflow: Place the chicken on the wire rack, leaving space between each piece.
- Add the Fat: Drizzle 3 tbsp of melted butter evenly over the tops of the chicken.
- Bake to Perfection: Bake for 40 minutes until the crust is golden brown and sizzling.
- Check the Temp: Ensure the internal temperature has reached 165°F (74°C) with a thermometer.
- Rest Before Serving: Let the chicken sit on the rack for 5 minutes until the juices settle and the crust firms up.
Fixing Common Chicken Cooking Issues
Even with the best instructions, things can go sideways in a hot oven. Let’s talk about how to fix things before they ruin dinner.
Why Your Coating Is Falling Off
If you find that the breading is sliding off the chicken like a loose coat, it usually comes down to one of two things: moisture or handling. If the chicken wasn't dried properly with paper towels, a layer of steam forms between the skin and the flour, pushing the crust away.
Also, make sure you aren't flipping the chicken. This recipe is designed to be "hands off" once it enters the oven. Every time you poke or prodded it, you risk breaking that delicate bond between the meat and the crumbs.
The Crust Is Pale And Soft
If your chicken is cooked through but looks like a sad, beige ghost, your oven might be running cold, or you skipped the butter drizzle. That fat is what carries the heat into the panko to create the "fried" effect.
If this happens, you can turn on the broiler for the last 2 minutes, but watch it like a hawk it goes from golden to burnt in a heartbeat.
| Problem | Root Cause | Solution |
|---|---|---|
| Soggy Bottom | No wire rack used | Always elevate chicken above the pan |
| Burnt Spices | Rack is too high in oven | Move to the center rack position |
| Dry Meat | Overcooked past 165°F | Use a thermometer and pull immediately |
Common Mistakes Checklist
- ✓ Never skip the paper towel pat down; dry skin is the key to a tight crust.
- ✓ Avoid using "fine" breadcrumbs; panko is necessary for the jagged, crispy texture.
- ✓ Don't use a flat baking sheet without a rack unless you want a soggy underside.
- ✓ Ensure the oven is fully preheated to 425°F before the chicken goes in.
- ✓ Resist the urge to flip the chicken; the air circulation handles both sides.
Fun Flavor Variations To Try
Once you've mastered the basic Oven Fried Chicken, you can start playing with the profile to match whatever you’re craving.
If you want a Spicy Nashville Twist, add a teaspoon of cayenne pepper to the flour mix and whisk a little extra hot sauce and honey into the melted butter before drizzling it over the top.
The honey will caramelize in the high heat, creating a sticky, spicy, and crunchy exterior that is absolutely addictive. For something more refined, a Parmesan Herb Crust works beautifully just swap out half of the panko for freshly grated Parmesan cheese and add some dried oregano and parsley to the mix.
If you happen to prefer a boneless option for quicker lunches, you should check out my crispy chicken cutlets which use a similar dredging technique but cook in half the time on the stovetop. It's a great alternative when you don't want to wait the full 40 minutes for the thighs to roast.
| Feature | Fresh Chicken | Shortcut (Frozen) |
|---|---|---|
| Texture | Shatter crisp and airy | Often dense or doughy |
| Flavor | Custom spiced and bright | Generic "salty" profile |
| Juiciness | High (thigh meat focus) | Moderate to Low |
Storing And Reheating Your Chicken
Leftover fried chicken is a gift, but only if you handle it right. If you just throw it in a plastic bag while it's still warm, the residual steam will turn that beautiful crust into a damp mess.
Storage: Let the chicken cool completely on the wire rack. Once cold, wrap the pieces individually in foil or place them in an airtight container with a piece of paper towel to absorb any moisture. It will stay fresh in the fridge for up to 3 days.
Freezing: You can freeze these! Place the cooled pieces on a baking sheet in the freezer for an hour to "flash freeze," then transfer them to a freezer bag. They’ll keep for about 2 months.
Reheating: Whatever you do, stay away from the microwave unless you like rubbery chicken. To get the crunch back, place the chicken on a wire rack over a baking sheet and bake at 375°F for about 10-15 minutes.
This allows the fat to re melt and crisp up the panko again.
Zero Waste Tip: Don't toss those leftover bones! Even though they've been roasted, they still have plenty of flavor. Throw them into a pot with some veggie scraps and water to make a quick, smoky chicken stock for your next soup.
Side Dishes To Serve Tonight
This chicken is the star of the show, but it needs a supporting cast that can stand up to its bold, savory flavor.
The classic move is a big bowl of creamy mashed potatoes and some peppery gravy. The soft texture of the potatoes is the perfect foil for the "crunch crunch" of the chicken. I also love serving this with a cold, tangy coleslaw.
The vinegar in the slaw cuts right through the richness of the chicken skin and the butter drizzle, refreshing your palate between bites.
If you want something a bit lighter, a simple green salad with a bright lemon vinaigrette is fantastic. Or, if you're in the mood for a full meal prep vibe, you could serve a sliced thigh over a bowl of grains and greens, similar to how I serve my Mediterranean chicken. The contrast of the warm, crispy chicken against cold, crisp cucumbers and feta is a total winner for a weekday lunch.
- If you want it traditional: Go with mac and cheese and collard greens.
- If you want it lighter: Serve with roasted broccoli and a squeeze of fresh lemon.
- If you want it spicy: Drizzle with extra hot sauce and serve alongside corn on the cob.
The Southern Classic For a truly traditional feel, serve this chicken with a side of honey drizzled cornbread. The sweetness of the corn and the heat from the hot sauce in the buttermilk dredge create a flavor profile that tastes like home, no matter where you grew up.
The aroma of the cornmeal and the toasted panko together is enough to make anyone pull up a chair and stay a while.

Very High in Sodium
845 mg of sodium (37% of daily value)
The American Heart Association recommends limiting sodium intake to about 2,300mg per day, ideally striving for 1,500mg. This recipe contributes significantly to that limit.
Tips to Reduce Sodium
-
Reduce Added Salt-25%
Significantly decrease or omit the 1 tsp of Kosher salt. You can start by using only 1/4 tsp or none at all, relying more on other seasonings.
-
Choose Low-Sodium Hot Sauce-20%
Many hot sauces are surprisingly high in sodium. Opt for a low-sodium or sodium free variety to make a substantial difference without sacrificing flavor.
-
Boost Flavor with Spices
Enhance the taste with more non-sodium ingredients. Increase the smoked paprika, garlic powder, onion powder, and thyme, or add fresh herbs like parsley or chives for vibrant flavor.
-
Be Mindful of Buttermilk-5%
While full fat buttermilk is used for coating, some commercial versions can contain added sodium. Look for a brand that has less than 50mg of sodium per serving.
-
Use Freshly Cracked Pepper
Ensure you are using freshly cracked black pepper. Pre-ground pepper can sometimes have added anti caking agents which may contain sodium.
Recipe FAQs
How do you cook fried chicken in the oven?
Preheat to 425°F and use a wire rack. Dip your chicken into a mixture of buttermilk, egg, and hot sauce, then coat it thoroughly in a panko flour blend seasoned with paprika, garlic, onion, and thyme before baking for 40 minutes.
Can a diabetic eat baked chicken?
Yes, this can fit into a diabetic friendly meal plan. Focus on portion control and balance the meal with non-starchy vegetables to manage the carbohydrate impact from the flour and panko breading.
How to get chicken in the oven crispy?
Pat the chicken completely dry before coating and use a wire rack. Elevating the meat allows heat to circulate underneath, while a drizzle of melted butter on top ensures a golden, crunchy crust without needing a deep fryer.
How long does fried chicken go in the oven?
Bake the chicken for 40 minutes at 425°F. This timing ensures the internal temperature hits 165°F while achieving a perfectly browned, crispy exterior.
Is it necessary to flip the chicken halfway through baking?
No, this is a common misconception. Baking on a wire rack allows hot air to reach all sides of the chicken simultaneously, so flipping is unnecessary and can actually damage the delicate breading.
How to store leftovers so they stay crunchy?
Let the chicken cool completely on the rack before wrapping. Trapping steam while the chicken is warm will turn the crust soggy; if you enjoyed mastering this moisture control, you can apply similar logic when prepping our healthy chicken parmesan.
How to tell if the chicken is fully cooked?
Use an instant read thermometer to check for an internal temperature of 165°F. Inserting the thermometer into the thickest part of the thigh, away from the bone, is the only way to guarantee safety and perfect doneness.
Shatter Crisp Oven Fried Chicken
Ingredients:
Instructions:
Nutrition Facts:
| Calories | 612 kcal |
|---|---|
| Protein | 36.8 g |
| Fat | 38.2 g |
| Carbs | 29.4 g |
| Fiber | 1.8 g |
| Sugar | 3.2 g |
| Sodium | 845 mg |
