Fudgy Mug Brownie: Perfectly Dense and Moist
- Time: Active 2 minutes, Passive 1 minutes, Total 3 minutes
- Flavor/Texture Hook: Intensely chocolatey with a fudgy, melt in-your mouth crumb
- Perfect for: Late night cravings, busy lives, and zero stress solo desserts
How to Make a Fudgy Mug Brownie
We’ve all been there: it’s late, you’re scrolling through TikTok, and suddenly you need chocolate. Not just a piece of candy, but a warm, gooey brownie. You grab a mug, toss in some pantry staples, and zap it.
But instead of a velvety treat, you pull out a rubbery, bouncy puck that tastes like sad cocoa and kitchen betrayal. It’s tough, dry, and honestly, a waste of good chocolate chips.
The problem usually comes down to one thing: treating a microwave like a miniature oven. Microwaves cook by vibrating water molecules, which can turn flour into a bouncy, elastic mess if you aren't careful with your ratios.
I’ve made that mistake more times than I’d like to admit, usually while trying to "health ify" it with too much flour or not enough fat. This recipe is the targeted fix for that specific struggle, ensuring you never eat a sponge textured dessert again.
This is the ultimate hack for busy lives where you want maximum flavor with minimal effort. We’re going to use melted butter to keep things moist and a specific "blooming" technique for the cocoa that makes it taste like it came from a high end bakery.
Trust me, once you see how the layers settle and the chocolate chips create those molten pockets, you'll never go back to boxed mixes.
Specs for Fast Results
When you're in a rush, you need to know exactly what you're getting into. This isn't a project that requires a stand mixer or an hour of your life. It’s a 3 minute sprint from "I'm hungry" to "I'm happy." The magic happens because we aren't waiting for a giant pan of batter to reach a certain internal temperature; we are focusing on a single, concentrated serving.
One thing to keep in mind is the "carryover" factor. Just like a steak, a brownie keeps cooking for a minute after it leaves the heat source. If you cook it until it looks dry in the microwave, it’s already overdone.
We are aiming for a center that looks slightly underdone almost like a thick pudding which will firm up into a fudgy masterpiece as it sits on your counter.
| Feature | Microwave Mug Brownie | Classic Oven Brownie |
|---|---|---|
| Total Time | 3 minutes | 45 minutes |
| Clean Up | One mug, one spoon | Bowls, pans, whisks |
| Texture | Soft, steamed, fudgy | Chewy edges, crackly top |
This comparison shows why the microwave version is such a game changer for solo snacking. You lose the "crackly" top of an oven baked brownie, but you gain a velvety, molten texture that is impossible to achieve in a 9x13 pan without a lot more work.
It’s all about trading that paper thin crust for immediate chocolate satisfaction.
Deep Ingredient Breakdown
To get that perfect texture, we have to look at what's actually happening inside that mug. Most people just stir and zap, but the order of operations matters. When we melt the butter first, we create a hot environment for the cocoa powder.
This "blooms" the chocolate, which is just a fancy way of saying the heat releases the flavorful oils trapped inside the dry powder. It makes the whole brownie taste deeper and more complex.
The sugar also plays a huge role here. We’re using a mix of granulated and light brown sugar. The granulated sugar provides sweetness and help with the structure, but that brown sugar? That’s our secret weapon.
The molasses in brown sugar adds moisture and a hint of caramel like flavor that keeps the crumb from feeling "flat." It’s the difference between a generic sweet treat and something that feels truly homemade.
- Fat Saturation: Melted butter coats flour proteins, preventing excess gluten from forming into a rubbery "net."
- Sugar Dissolution: Whisking sugars into the warm butter/milk mixture ensures a smooth texture rather than a grainy one.
- Starch Gelatinization: The quick burst of microwave energy rapidly swells the flour starches, setting the structure in seconds.
- Residual Setting: Resting allows the starches to firm up, turning a liquid center into a fudgy solid.
| Component | Science Role | Pro Secret |
|---|---|---|
| Unsalted Butter | Fat source for moisture | Melt it first to bloom the cocoa powder. |
| Unsweetened Cocoa | Flavor and structure | Whisk into hot butter to release aromatic oils. |
| All Purpose Flour | Binding agent | Fold it in last to avoid over mixing the gluten. |
| Light Brown Sugar | Humectant (retains moisture) | Pack it tightly to ensure the correct volume. |
One mistake I once made was trying to use cold milk and cold butter together. The butter immediately clumped up into little wax like beads, and the brownie came out greasy and uneven. Always make sure your butter is fully melted and your milk is added while that butter is still warm.
It creates a stable emulsion that results in a much more professional crumb.
Essential Mug Gear
You don't need a professional kitchen, but the vessel you choose matters. For this Mug Brownie, a 12 ounce mug is the gold standard. If you use a tiny teacup, the batter will overflow and create a sticky mess on your microwave glass.
If you use a giant soup bowl, the batter will spread too thin and dry out before the center is set. A standard cylindrical coffee mug provides the perfect depth for even heat distribution.
You’ll also want a small whisk or a sturdy fork. A spoon is fine for eating, but it’s terrible for getting those lumps out of the cocoa powder. I keep a tiny whisk specifically for my microwave desserts because it incorporates air and breaks up the flour streaks way better than a dull spoon ever could.
If you're into TikTok trends, you know that the "aesthetic" of the mug is half the fun, so pick your favorite one.
Chef's Tip: Use a mug with straight sides rather than a tapered bottom. Tapered mugs can cause the bottom of the brownie to stay raw while the top overcooks.
Beyond the mug, make sure your microwave is clean. Any splatters on the ceiling of the microwave can interfere with how the waves bounce around, leading to "hot spots." We want that energy hitting the mug evenly so the brownie rises as one beautiful, chocolatey unit.
Simple step-by-step Flow
Follow these steps exactly, and don't try to rush the mixing process. The order is designed to manage the temperature of the ingredients for the best possible emulsion.
- Melt the butter. Place 2 tablespoons unsalted butter in a 12 ounce microwave safe mug and microwave 30 seconds until completely melted.
- Bloom the cocoa. Immediately whisk 2 tablespoons unsweetened cocoa powder into the hot butter Note: this releases the deep chocolate aromas.
- Mix the liquids. Stir in 2 tablespoons whole milk, 1/4 teaspoon vanilla, 2 tablespoons granulated sugar, 1 tablespoon light brown sugar, and a pinch of salt until the mixture looks smooth and glossy.
- Incorporate the flour. Gently fold in 1/4 cup all purpose flour Note: stop the moment you see no more white streaks.
- Add the chips. Stir in 2 tablespoons semi sweet chocolate chips for those molten pockets.
- The power burst. Microwave on high for 60 seconds until the edges are set but the center still looks slightly wet.
- The critical rest. Let the brownie sit for 1-2 minutes. Do not skip this. The structure is setting during this time.
- Enjoy. Grab a spoon and dive in while it's still warm.
If you love this quick format, you might also enjoy these no bake cookies which are just as fast but made on the stovetop. They hit that same cocoa heavy craving without the risk of a rubbery mug cake if your microwave is particularly powerful.
Fix All Cooking Errors
Even the simplest recipes can go sideways if your microwave is a beast or if your flour measurement was a bit heavy handed. The most common complaint is the "rubber puck" syndrome. This almost always happens because of overcooking.
Microwave power varies wildly; a 1200 watt microwave will cook this much faster than a 700 watt dorm model.
If Your Brownie is Rubbery
This is usually caused by over mixing the flour or over baking. When you stir flour too much, you develop gluten, which is great for bread but terrible for brownies. Also, if you microwave it until it's completely dry on top, the internal temperature has gone too high, toughening the proteins and sugars.
If the Brownie Overflows
This is a classic "small mug" problem. If your mug is less than 12 ounces, the steam generated during cooking will push the batter right over the rim. It can also happen if you whisk too much air into the batter during the final stage. Keep your folding gentle once the flour is in.
| Problem | Root Cause | Solution |
|---|---|---|
| Dry/Crumbly | Too much flour | Use the "spoon and level" method for measuring flour. |
| Oily/Greasy | Butter didn't emulsify | Whisk milk and sugar into butter more vigorously before adding flour. |
| Raw Center | Microwave power too low | Add 10 second bursts until the edges are firm. |
Common Mistakes Checklist
- ✓ Check your mug size - 12 ounces is the minimum to prevent a chocolate volcano.
- ✓ Don't overcook - the center should look "wobbly" when you pull it out.
- ✓ Measure flour correctly - don't scoop directly from the bag, as it packs the flour down.
- ✓ Let it rest - eating it immediately will feel like eating hot lava and the texture won't be right.
- ✓ Use whole milk - lower fat milks don't provide the same richness or structure.
Variations and Easy Swaps
The beauty of a single serve recipe is that you can experiment without ruining a whole batch. If you're feeling adventurous, you can swap the chocolate chips for peanut butter chips or even a swirl of Nutella. For those who want even fewer steps and different flavors, my 3 ingredient peanut butter cookies are a total lifesaver for the lazy baker.
| Original Ingredient | Substitute | Why It Works |
|---|---|---|
| Whole Milk | Heavy Cream | Adds even more fat for a truffle like richness. |
| All Purpose Flour | 1:1 gluten-free Blend | Similar structure. Note: May be slightly grittier. |
| Butter | Coconut Oil | Same fat ratio but adds a subtle tropical flavor. |
For a Salty Sweet Swirl
Add a teaspoon of peanut butter to the center of the batter before microwaving. Don't stir it in completely; let it stay as a pocket of melted goodness. A sprinkle of flaky sea salt on top after the rest period will also cut through the sugar and make the chocolate pop.
For a Vegan Friendly Version
You can easily swap the butter for a neutral oil like avocado oil and use almond or soy milk. Since there are no eggs in this recipe, the structure relies heavily on the flour and sugar, so plant based milks work surprisingly well here. Just make sure your chocolate chips are dairy-free!
Keeping Your Brownie Fresh
Honestly, the chances of you having "leftover" Mug Brownie are slim to none. It’s a single serving for a reason! However, if you find you can't finish it, or you want to prep the dry ingredients ahead of time, there are ways to keep the quality high.
- Fridge: You can cover the mug with plastic wrap and keep it in the fridge for up to 2 days. To reheat, zap it for 10-15 seconds just to soften the fats again.
- Freezer: I wouldn't recommend freezing the cooked brownie as the microwave texture doesn't hold up well to thawing.
- Zero Waste: If you have cocoa powder left in the bottom of the bag that isn't enough for a full recipe, save it in a small jar. These "scraps" are perfect for dusting over the top of the finished brownie or stirring into your morning coffee.
- make-ahead: You can whisk the dry ingredients together in a small baggie. When the craving hits, just add the melted butter, milk, and vanilla. It’s like having your own custom "brownie mix" ready to go.
Styling for the 'Gram
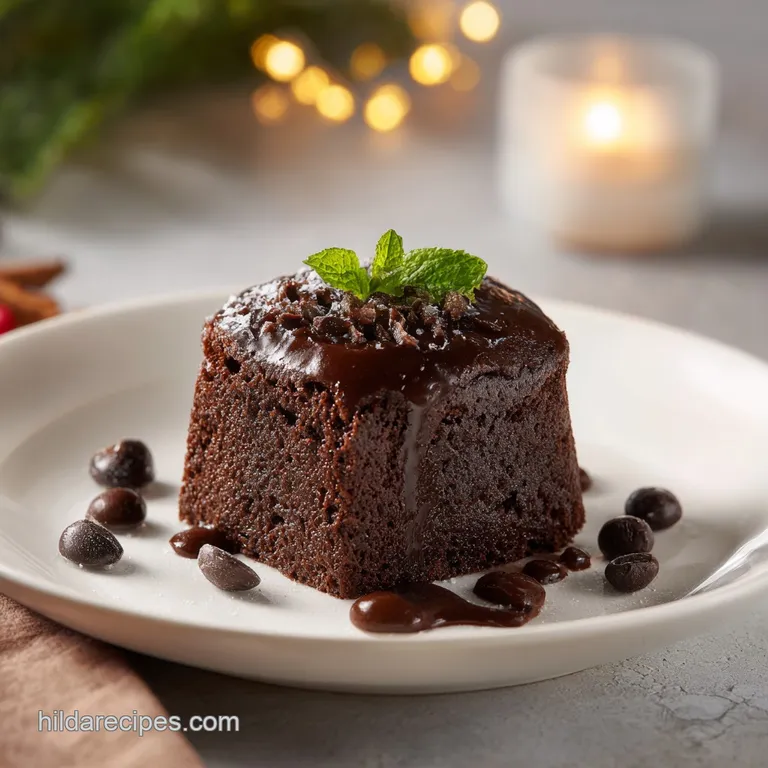
If you're going to post your creation, you want it to look as good as it tastes. A brown blob in a mug can be hard to photograph! The trick is all in the toppings. A dollop of whipped cream or a small scoop of vanilla bean ice cream adds a color contrast that makes the chocolate look even darker and richer.
Add a few extra chocolate chips on top immediately after it comes out of the microwave so they melt into shiny pools. If you have a sprig of mint or a few raspberries, toss those on for a pop of color. Lighting is everything move your mug near a window for that natural glow.
Remember, we eat with our eyes first, even if we're just eating on the couch in our pajamas!
One thing that really changes the look is the "dusting." A tiny pinch of extra cocoa powder or powdered sugar through a mesh sieve makes the mug look like it came from a bistro. It covers any unevenness in the rise and gives it a professional finish.
Just make sure the brownie has rested for the full 2 minutes so the topping doesn't immediately dissolve into the heat.
Myths
One big misconception is that you need eggs to make a brownie. In a large pan, eggs provide the lift and that signature "meringue" top, but in a mug, eggs often lead to a "spongy" or "rubbery" texture. Because the microwave cooks so fast, the egg proteins can tighten up too much.
This recipe skips the egg entirely to focus on a dense, fudgy crumb that relies on the fat and sugar for structure.
Another myth is that "microwaving kills the flavor." In reality, because the cook time is so short, you actually preserve some of the more delicate notes in the vanilla and cocoa that might burn off in a 30 minute oven bake.
As long as you bloom your cocoa in the hot butter first, you're getting a massive hit of flavor that rivals any traditional method. It's not "cheating" it's just efficient science!

Recipe FAQs
How to make chocolate mug brownies?
Melt 2 tablespoons of butter in a 12-ounce microwave safe mug for 30 seconds. Whisk in 2 tablespoons of cocoa powder, then stir in 2 tablespoons of granulated sugar, 1 tablespoon of packed light brown sugar, 2 tablespoons of whole milk, 1/4 teaspoon of vanilla, and a pinch of salt.
Fold in 1/4 cup of all-purpose flour and 2 tablespoons of semi sweet chocolate chips, then microwave on high for 60 seconds.
What is the best mug size for brownies?
Use a 12-ounce mug at minimum. This size provides enough headspace to prevent the batter from overflowing or creating a "chocolate volcano" while it cooks in the microwave.
Can you make brownies in a mug with brownie mix?
No, this recipe is designed specifically for scratch ingredients. Using a boxed mix will change the ratios of flour and sugar, leading to inconsistent texture and potential overflow issues.
Is it safe to microwave brownies in a mug?
Yes, it is perfectly safe as long as you use a microwave safe mug. Ensure your mug is ceramic or glass and free of any metallic paint or rims, which can spark in the microwave.
Is it true I should eat the brownie immediately after microwaving?
No, this is a common misconception. You must let the brownie rest for 1-2 minutes after the 60-second cook time; this allows the residual heat to finish cooking the center and lets the structure set properly.
How to tell if the brownie is finished cooking?
Look for a center that appears slightly underdone or wobbly. It is crucial not to overcook the brownie, as the residual heat will finish the process while it rests.
How to ensure the flour doesn't result in a dense brownie?
Measure your flour by spooning it into the measuring cup instead of scooping it directly from the bag. Scooping packs the flour down, leading to too much dry ingredient and a dry, rubbery texture.
Fudgy Mug Brownie

Ingredients:
Instructions:
Nutrition Facts:
| Calories | 655 kcal |
|---|---|
| Protein | 8.9 g |
| Fat | 34.4 g |
| Carbs | 91.3 g |
| Fiber | 6.1 g |
| Sugar | 56.1 g |
| Sodium | 215 mg |
