If you’re craving a sweet, crispy snack that’s both satisfying and easy to make, wafer cookies are the answer. These light, delicate treats are made from thin, crisp layers of wafer and often filled with delicious creams or chocolates. Whether you’re enjoying them with a hot cup of coffee, gifting them to friends, or simply indulging in an afternoon snack, Wafer Cookies are a versatile and timeless treat that everyone loves.
Table of Contents
What Are Wafer Cookies ?
Wafer cookies are light, crisp, and often layered cookies that have a delicate crunch and a subtly sweet flavor. They are typically made with thin, crisp wafer sheets that are stacked with layers of creamy filling, but they can also be enjoyed plain or with a variety of different toppings and fillings. Their crisp texture and ability to pair well with different flavors make them a popular choice for both casual snacking and fancy desserts.
While many people know wafer cookies for their store-bought versions, like those crunchy chocolate-filled cookies, making them at home gives you the freedom to customize the flavor and texture to suit your tastes. You can opt for classic vanilla, chocolate, hazelnut, or even go with a fruit-flavored filling. The wafer itself is usually made from a simple mix of flour, sugar, eggs, and a bit of oil or butter—making it a straightforward dough to prepare.
Ingredients You’ll Need to preper Wafer Cookies
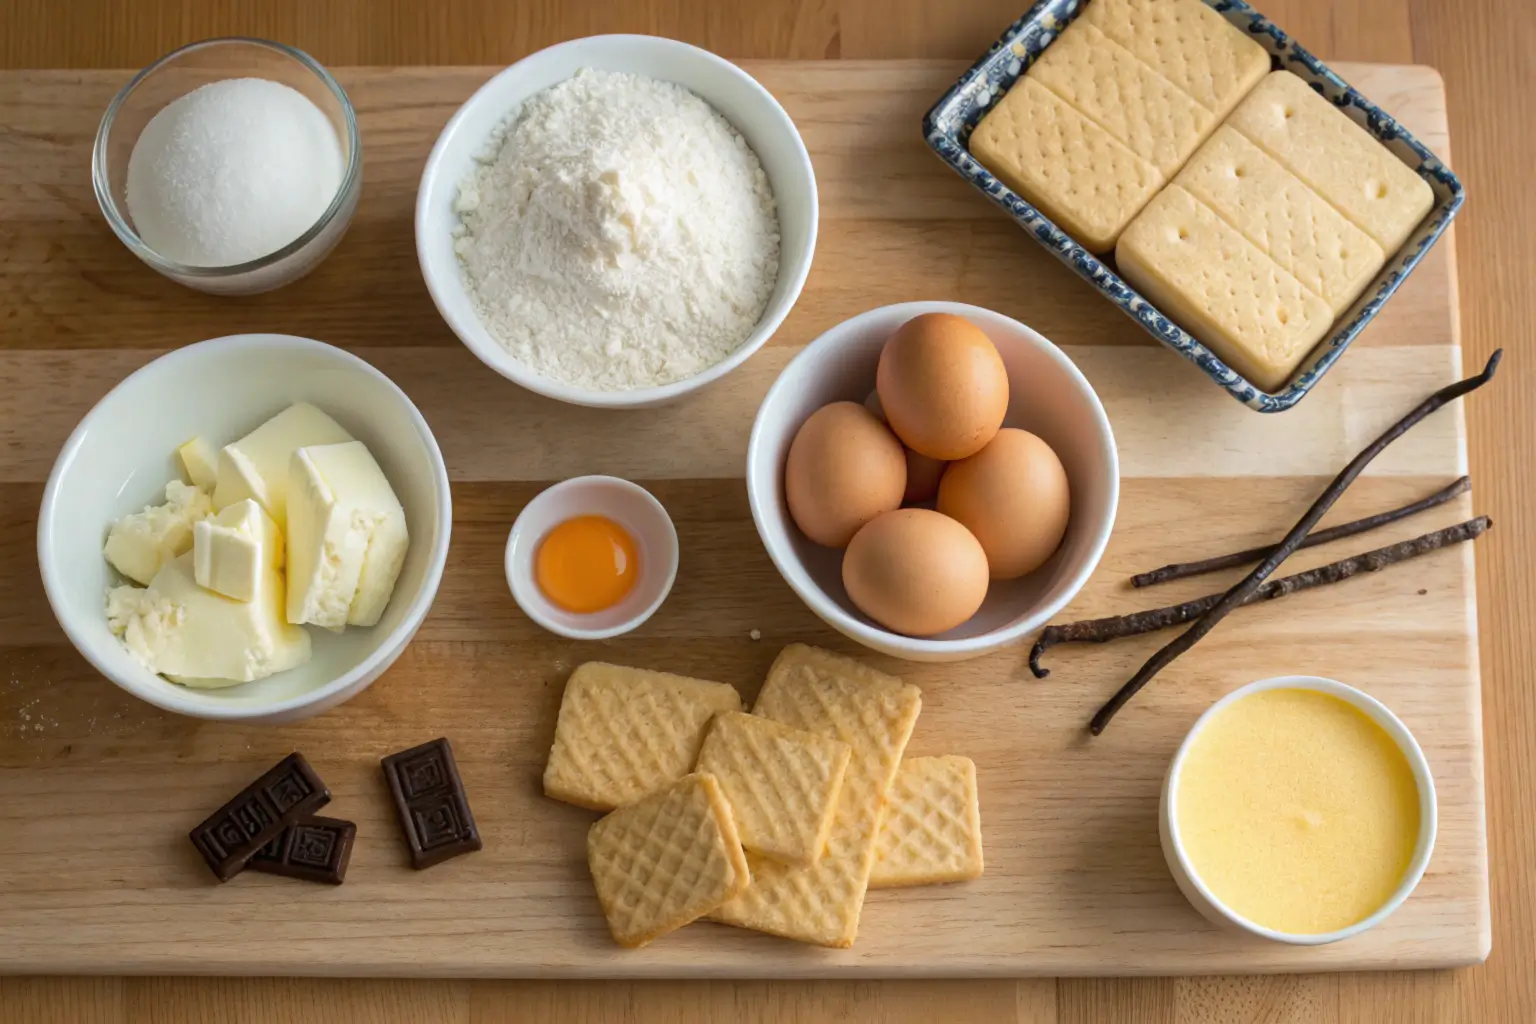
Making wafer cookies at home is incredibly simple, and the best part is that you probably already have most of the ingredients in your pantry. This recipe calls for just a few basic staples, so you can enjoy homemade, crispy wafer cookies without any hassle. Here’s what you’ll need:

For the Wafer Dough:
- All-purpose flour – This forms the base of the dough, giving the cookies their structure and texture.
- Sugar – A small amount of sugar adds the right touch of sweetness to balance the flavors.
- Butter – Butter helps make the dough tender and adds a rich flavor to the wafers.
- Eggs – Eggs help bind the dough together and give the wafer sheets their crispy texture when baked.
- Vanilla extract – A hint of vanilla adds depth and improve the flavor of the dough.
- Baking powder – This is the leavening agent that helps the wafers puff up slightly, giving them that delicate crispness.
For the Filling (Optional):
- Sweetened condensed milk – For a creamy, sweet filling that pairs perfectly with the crisp wafers.
- Powdered sugar – Used to sweeten the filling and help it set properly.
- Cocoa powder or melted chocolate – If you prefer chocolate-filled wafers, cocoa powder or melted chocolate can give the filling a rich, indulgent flavor.
- Hazelnut spread or fruit jams – For a fun twist, you can use Nutella or fruit preserves for a unique filling option.
Optional Toppings:
- Powdered sugar – A light dusting of powdered sugar on top of the cookies adds a touch of elegance.
- Chopped nuts – For an extra crunch, you can sprinkle chopped nuts (like almonds or hazelnuts) on top of the filling before sealing the wafers.
Ingredient Substitutes:
- Gluten-free flour: You can substitute the all-purpose flour with a gluten-free flour blend if you’re following a gluten-free diet.
- Dairy-free butter: If you need a dairy-free option, you can use margarine or coconut oil in place of butter.
- Non-dairy filling: For a dairy-free filling, try coconut cream or dairy-free chocolate.
How to Make your Wafer Cookies
Now that you have your ingredients ready, it’s time to make the wafer cookies! Don’t worry—this recipe is simple and straightforward. Follow these easy steps to bake your own batch of crispy, delicious wafer cookies.
Prepare the Wafer Dough
- Set your oven to 350°F (175°C) and line a baking sheet with parchment paper.
- Using a large mixing bowl, beat the butter and sugar together until the mixture becomes light and fluffy. This should take approximately 2-3 minutes with a hand or stand mixer.
- Add the eggs individually, mixing thoroughly after each one. Then, stir in the vanilla extract.
- In another bowl, whisk the flour and baking powder together. Slowly incorporate the dry mixture into the wet ingredients, mixing until the dough begins to form. Be careful not to overmix; the dough should be smooth and not overly sticky.
Roll Out the Dough
- Divide the dough into small portions. Roll each portion between two sheets of parchment paper to about 1/8-inch thickness. You can use a rolling pin or your hands to spread the dough evenly.
- Cut the dough into rectangles or squares, depending on the shape you prefer for your wafer cookies. Aim for sizes that are about 2×3 inches—small enough to be bite-sized but big enough to hold a layer of filling.
Bake the Wafer Sheets
- Transfer the dough pieces to the prepared baking sheet, leaving about an inch between each piece.
- Bake for 6-8 minutes, or until the wafers are lightly golden and crisp. Watch them closely to prevent over-baking.
- Once done, remove the wafers from the oven and let them cool completely on a wire rack. They will crisp up as they cool.
Prepare the Filling (Optional)
- While the Wafer Cookies are cooling, prepare your filling of choice. For a simple creamy filling, beat together sweetened condensed milk and powdered sugar until smooth. If you’re using melted chocolate or hazelnut spread, just have them ready to go.
- Once the wafers have cooled, spread a thin layer of filling on the bottom of one wafer. Be sure not to use too much, as the filling can ooze out when you press the wafers together.
- Top with a second wafer to create a sandwich. Press gently to seal the edges and keep the filling in place.
Let the Cookies Set
- For the best results, let the filled Wafer Cookies sit for about 30 minutes to allow the filling to firm up and the cookies to set.
- Optionally, you can dust the tops with a little powdered sugar for a polished, elegant look.
Creative Variations for Wafer Cookies

One of the best things about Wafer Cookies is how versatile they are. While the classic wafer cookie with a simple cream filling is delicious on its own, you can easily switch things up and get creative with different fillings and flavors. Here are some fun and delicious variations of wafer cookies that you can try, whether you’re looking for something extra indulgent or want to put a unique twist on the classic recipe.
1. Chocolate Hazelnut Wafer Cookies
If you’re a fan of rich, nutty flavors, try filling your Wafer Cookies with chocolate hazelnut spread (such as Nutella). The combination of creamy chocolate and the crunch of the wafer is absolutely irresistible. You can even sprinkle some chopped hazelnuts inside the filling for an added crunch!
2. Vanilla Almond Wafer Cookies
For a lighter, more elegant flavor, try a vanilla almond filling. Simply mix almond butter or almond paste with powdered sugar and a bit of vanilla extract for a smooth, sweet filling. This variation is perfect if you’re serving the wafer cookies at a special occasion like a tea party or holiday gathering.
3. Fruity Wafer Cookies
For a refreshing twist, consider using fruit jams or preserves as your filling. Raspberry, apricot, or strawberry jam can add a burst of sweetness and a little tartness to balance out the cookies’ crunch. For an extra indulgence, try mixing the jam with a bit of cream cheese to create a creamy, tangy filling that pairs wonderfully with the fruity flavors.
4. Dark Chocolate Wafer Cookies
For chocolate lovers, dark chocolate makes an amazing filling for wafer cookies. You can melt some dark chocolate and combine it with a bit of cream to create a rich, velvety filling. If you want to take it a step further, add a pinch of sea salt to the chocolate for an extra layer of flavor.
5. Peanut Butter Wafer Cookies
Peanut butter and chocolate is a classic combo, so why not combine them in Wafer Cookies ? Spread a thin layer of peanut butter between the wafer sheets, then dip the edges in melted chocolate for a decadent treat. For a bit of crunch, sprinkle chopped peanuts over the peanut butter before sealing the wafers together.
6. Lemon Cream Wafer Cookies
If you’re craving something light and zesty, lemon cream filling is a refreshing option. Mix lemon zest, cream cheese, and powdered sugar to create a smooth, tangy filling that pairs perfectly with the crisp wafers. This is a great option for a spring or summer treat.
7. Matcha Wafer Cookies
For a unique, slightly earthy flavor, try using matcha powder in your filling. Combine matcha powder with white chocolate or heavy cream to create a smooth, vibrant green filling that’s as beautiful as it is delicious. The matcha’s subtle bitterness balances the sweetness of the wafer and cream.
8. Coconut Cream Wafer Cookies
Coconut lovers will adore this variation! A coconut cream filling made from coconut milk, shredded coconut, and a little powdered sugar creates a tropical, creamy filling that pairs wonderfully with the crunchy wafer. You can even sprinkle some toasted coconut on top for extra flavor.

FAQ
Whether you’re a first-time baker or a seasoned pro, these answers will confirm your Wafer Cookies turn out perfectly every time!
1. Can I make wafer cookies without a filling?
Absolutely! While Wafer Cookies are often filled with sweet creams or chocolate, they can be enjoyed plain as well. The wafer itself is deliciously crisp and has a subtle sweetness, making it a perfect snack on its own. If you want a lighter treat, simply bake the wafers without any filling and enjoy them as is.
2. How do I prevent the wafer cookies from becoming soggy?
Soggy wafer cookies can happen if there’s too much moisture in the filling or if they’re stored improperly. To prevent this:
- Use a thick filling (like chocolate ganache or hazelnut spread) that won’t ooze out too much.
- Be sure to cool the wafers completely before assembling to avoid any steam or moisture.
- Store filled cookies in an airtight container at room temperature or in the freezer if you’re not going to eat them right away.
3. How do I make wafer cookies gluten-free?
Making wafer cookies gluten-free is simple! Just substitute the all-purpose flour with a gluten-free flour blend. You might need to experiment with the texture a little, but it should work well. You can also try adding xanthan gum to help with the dough’s structure.
Conclusion
Wafer cookies are a delightful and versatile treat that can suit any occasion, from casual snacking to special celebrations. Their crisp, light texture and endless possibilities for fillings make them a favorite for both experienced bakers and beginners alike. Whether you’re filling them with creamy chocolate, tangy fruit jam, or a rich nut spread, wafer cookies never fail to impress.
Making these cookies at home is surprisingly simple, and you can customize them to your liking with just a few basic ingredients. If you’re craving something classic, a vanilla cream filling is always a hit, but don’t be afraid to get creative with your choices. The beauty of wafer cookies lies in their flexibility, allowing you to survey new flavors and combinations.
Happy baking, and enjoy your homemade wafer cookies! Click for More Recipes


Comments are closed.